March 15, 2013

What cupcakes do you make for podiatrists?


Supplying birthday cakes for a medical clinic is lots of fun, especially when it's a podiatrist's birthday.  I've done little petit four feet before, but these feet cupcakes are cuter (in my opinion) and much, much easier.  I never thought I'd call any feet other than babies' feet cute, but hey.

I used my tried and true vanilla cupcake recipe, levelled the tops off, then spread a circle of white royal icing on with a knife.  Easy.  Then I tinted some royal icing purple (you can use whatever colour you like, but I'd avoid red, because I think that'd make the feet look a bit diseased) and plopped it in a ziplock bag, then cut a hole in the corner and piped some little feet on.

They're so cute, argh.  Just look at their little dotty toes!


March 11, 2013

Chocolate Shortbread Drops


These chocolate shortbread bites are delicious and so easy to make!

Recipe Adapted From: Gorgeous Biscuits (FamilyCircle)
Ingredients
150g dark chocolate
250g butter
125g caster sugar
310g flour

Method
1. Preheat the oven to 160 C (315 F).  Prepare your baking trays with baking paper/silicone sheets.

2. Melt the chocolate in the microwave and set aside.

3. Beat the butter and sugar until light and creamy.


4. Add the melted chocolate to the butter mixture and beat until combined.


5. Mix the flour in gently.  The dough will be very soft!


6. Drop spoonfuls of the dough onto your baking trays and, if desired, roll a bit so they're spherical.  I like to make these cookies a bit bigger than teaspoon size so that they're bite-sized.


7. Bake for 12-15 minutes depending on the size of your cookies.  Let them cool on the trays for a bit and then transfer to wire racks until completely cooled.


March 5, 2013

Salted Caramel Toffee Semifreddo


I had never made something from scratch that even resembled ice cream and Mum still refuses to get an ice cream maker (and yet she wants to buy a salad spinner - we never make salad), so I came across this recipe while trawling the Internet for ice cream-y things that could be frozen in a cake tin.  Though the method requires a lot of steps, this delicious, tooth-achingly sweet semifreddo doesn't disappoint!

Recipe Adapted From: Citrus and Candy
Ingredients - toffee
100g caster sugar
1/2 tsp salt

Ingredients - caramel
100g caster sugar
50mL water
50g butter
1 tsp salt
150mL cream

Ingredients - semifreddo base
6 egg yolks
50g caster sugar
1 tsp vanilla extract
350mL thickened cream

Method
1. Make the toffee!  Prepare a baking tray with a silicone mat (or lightly greased baking paper) on top.  Then heat the sugar in a heavy based saucepan until the edges start to melt and the sugar is slightly brown.  Get a silicone spatula and stir the melted sugar gently into the centre of the pan.  Keep stirring until all the sugar has dissolved.

2. Stir every once in a while until the toffee starts to smoke and is an amber colour.  Working quickly, stir the salt into the sugar and pour the toffee onto the baking tray.  Lift the tray up and tilt it so that the toffee spreads out (like crepe batter).  Try to make it as thin as you can!  Then set the toffee aside to cool.


3. After the toffee's cooled, you need to break it into little pieces.  I rolled mine in the silicone mat, but since the toffee breaks into sharp shards, I ended up poking a hole in the silicone!  I suggest using a rolling pin and bashing it to break it up.


4. Make the caramel!  Combine the sugar and water in a heavy based saucepan and stir over a medium heat until the sugar has dissolved.  Brush any sugar that's crept up the sides of the pan back into the mixture and cook until it's a deep amber colour, which should take about 8 minutes.

5. Add the butter and salt to the sugar mixture.  Be careful because the butter will spit, and it's hot!  Stir to combine, then add the cream and stir until completely mixed in.

6. Whisk the egg yolks with the 50g caster sugar and vanilla extract until pale, fluffy and thickened.

7. While the mixer is running, slowly pour the caramel in until it's all incorporated.  Mix for another five minutes or so to cool the mixture down a bit.


8. Whip the 350mL cream until soft peaks form.

9. Gently fold the cream and the crushed toffee into the egg mixture.

10. Pour the semifreddo into a container (I used a square metal cake tin - you can use different sized containers depending on how deep you want your semifreddo to be), cover with cling wrap and stick it in the freezer for at least six hours.  If you don't leave it in the freezer for long enough, the top will look all good and set but the bottom will still be syrupy.  I know this.


11. After it's set, take the semifreddo out (set it aside for a few minutes if it's difficult to spoon out) and consume.


Look at that delicious caramel toffee goodness!  This was so sweet.  I'm not joking about the toothache thing.


You can see the syrupy un-set bottom here...my brother and I were impatient.

It was so good, we eventually gave up scooping it into bowls and just ate it with a spoon.  My first foray into handmade frozen goods was a success!

March 3, 2013

Praline Paste


If you have never tried praline paste, now is the time to make some of your own and become enlightened.


Praline paste is quite simple - it's made from nuts, toffee and, if you really want (I really wanted), chocolate.  Commercially produced praline paste is completely smooth but when homemade it turns out with tiny bits of roasted nuts and toffee.  It still tastes like heaven.  Delicious, chocolatey, nutty heaven.  Think Nutella.  But better.


Recipe Adapted From: Joe Pastry
Ingredients
225g white sugar
50g water
225g hazelnuts (you can substitute half the hazelnuts for almonds, but I think that hazelnuts taste much better)
(optional) about 2 oz dark chocolate

Method
1. Make sure that your nuts are peeled!  If you didn't get blanched hazelnuts, take a look at this post about how to peel hazelnuts.

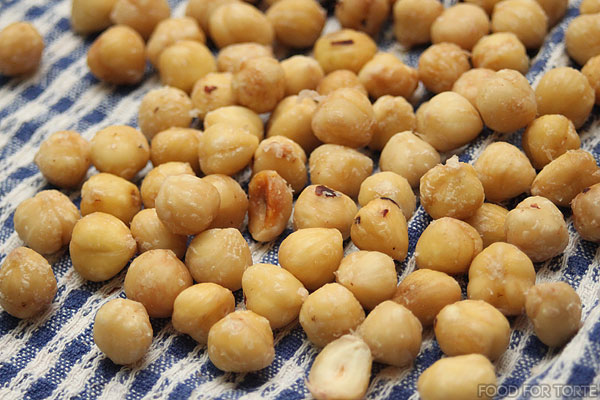
2. Roast the nuts, either in the oven on grill setting, or in a frypan, until lightly browned.  They should start to smell delicious and look a bit oily as their natural oils seep out.  When they're done, set them aside to cool.


3. Arrange the nuts on a silicone sheet or a sheet of baking paper on a tray in preparation to pour the toffee on top.


4.. In a saucepan, combine the sugar and water and heat until the mixture turns a light golden/amber colour.  If you want a bit more bite to your praline, heat until a darker colour, but I prefer it lighter.  This should take quite a while, about five minutes or so, but keep watching it!

If you're using a heavy-based saucepan, keep in mind that the toffee will keep cooking as  you are pouring it over the nuts and can end up tasting a bit burnt - so make sure that the toffee is of a lighter colour if you're using a saucepan that retains a lot of heat.


5. Quickly pour the toffee over the nuts.


This was our first attempt at the praline - the toffee was a bit too burnt, as you can see from the dark colour.


On our second attempt, we were more careful with the toffee and hence it is a lighter colour and tasted much better!


6. Wait for the praline to harden.  If you're impatient, place an ice pack underneath the tray that the praline is on.

7. Once hard, break the praline into small chunks and place in a food processor.


You can either break the praline by hand, or you can place the chunks in two freezer bags (for added strength, because the bags break quite easily) and bash them a bit with a rolling pin or the flat of a hammer.

8. Blitz in the food processor until the praline becomes liquid-like and smooth.  This might take a while, depending on the strength of your processor!  Don't be afraid to really blast it, though.


This is the consistency that you want your paste to be - nice and liquid so that it levels itself out.


9. If you want to add chocolate, add it now.  The praline paste should be quite hot so if you're using small enough bits (chocolate chip sized), you can just chuck the chocolate in and process until combined.  Alternatively, melt the chocolate first and then blitz to mix.

10. Decant the praline paste into a jar (or your mouth) and enjoy on a spoon, on a cake or even on your bread!


March 1, 2013

How To Peel Nuts


It is often that recipes call for peeled/de-skinned nuts.  Blanched almonds can be found easily in supermarkets, but I've found that blanched hazelnuts are more difficult to find.  I've tried the good old method of roasting the nuts then rubbing the skins off with a tea towel, but I found that this method left quite a lot of skin still on the nuts.  Thankfully, there is an easier way.


Enter water and bicarb soda!

This blanching process is super easy, not overly time consuming, and the results are great.

Recipe Adapted From: My Baking Addiction
Ingredients
2 cups water
2-3 tbsp bicarb soda
Approx 230g hazelnuts or almonds

Method
1. Combine the water and bicarb soda and bring to a boil in a saucepan.

2. Add the nuts.  The mixture should foam.  If the froth threatens to overflow, just lift the pan off the stove for a bit until it goes down.  Warning - mixing does not help!


3. After about four/five minutes, tip the nuts into a colander and run under cold water.


4. Using your fingers, peel the nuts.  The skin should slough off easily, but some may require a bit of picking.  (Almonds are much, much easier to peel - the skins come off in one chunk without any problems.  Hazelnuts are a bit more difficult.)


5. Once the nuts are peeled, dry them with paper towels or a tea towel.


It's best to roast the nuts to remove some of the moisture absorbed in the blanching process.  I found that the best result was achieved when the nuts were baked in the oven at about 200 C for five minutes or so and then toasted under the grill.

February 27, 2013

Heart Attack Slice


Heart Attack Slice is a delicious merging of brownies and choc chip cookies.


It's a fatal combination.


Making the slice is so easy - just whip up some choc chip cookie dough and then some brownie batter and smoosh them together.


So delicious.  For an extra bit of something, add nuts (I usually use pecans) to the cookie dough.