August 16, 2013

Peanut Butter Chocolate Cookies


Do you feel like soft, chocolatey, peanutty melt-in-your-mouth cookies?  Yeah, me too.  Here's the perfect recipe.
Recipe Adapted From: Scientifically Sweet
Ingredients
125g butter
185g brown sugar
63g white sugar
1/4 cup peanut butter (crunchy or smooth, your pick)
1 egg
1 tsp vanilla essence/extract
1/2 tsp bicarb soda
250g flour
20g cocoa powder
150g choc chips


Method
1. Preheat the oven to 175 C (350 F).

2. Cream the butter with both sugars until light and fluffy.  Add peanut butter and beat until combined.

3. Add the egg and vanilla, mix until combined.

4. Add the bicarb, flour and cocoa powder and fold in.

5. Add the chocolate chips and mix.


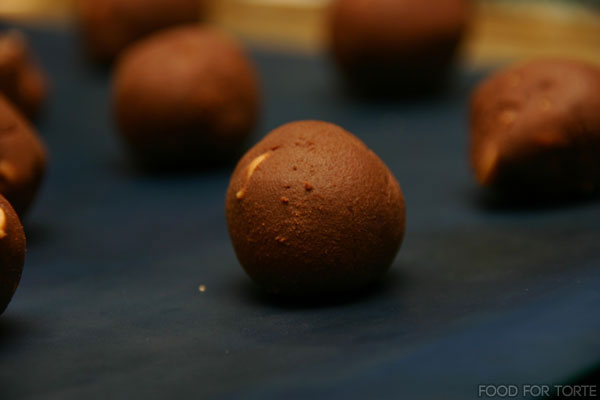
6. Roll the dough into balls the size of your choosing (I did mine a bit smaller than a tablespoon) and place onto a tray covered in baking paper or a silicone sheet.  They don't spread much, so you can put them quite close together.


7. Bake for about 15 minutes, or until the tops of the cookies start getting cracks.  Don't overbake them, or they'll lose the softness of their insides.

8. After the cookies have cooled on the tray for a bit, transfer them to a wire rack and enjoy.


August 2, 2013

Moist Banana Bread with choc chips and pecans


Ahh, bananas.  To tell the truth, I don't like to eat them on their own and my brother absolutely loathes them.  Occasionally, however, my grandmother guiltily hands me a few brown-spotted soft bananas and mumbles something about baking, and I sigh but I do what I must.  What I must do is bake banana bread.  In the past, the recipe I've used is this one; but my Mum requested 'moist banana bread' so, as a dutiful daughter, I consulted Google and Google brought forth this recipe to me.

Boy, is it a winner.  The other recipe is definitely quicker and easier to make, but the extra couple of steps for this one are definitely worth it.  Moist, check; delicious, check; my banana-hating brother will eat it, check.

Recipe adapted from: The Redhead Riter
Ingredients - 11 x 21 cm (4 x 8 inch) loaf
125g butter
250g white sugar
3 eggs
1 tsp vanilla extract
255g flour
1 tsp bicarb soda
1/2 tsp sale
2 ripe/overripe bananas
1/2 cup sour cream
60g pecans
1/2 cup chocolate chips (optional)

Method
1. Preheat the oven to 175 C (350 F).  Beat butter and sugar until creamy.

2. Add eggs one at a time, beating between each addition.  Add vanilla and mix in.

3. Add the flour, bicarb soda and salt to the batter and mix gently until combined.

4. Mash the bananas with a fork then add them to the batter along with the sour cream.  Mix until combined.

5. Add the pecans and chocolate chips to the batter and combine.  The chocolate chips aren't in the original recipe, but I am guilty of adding chocolate to everything.

6. Pour the batter into a loaf tin lined with baking paper and bake for about 1.5 hours or until an inserted skewer comes out clean.  The top of the banana bread will go quite brown, but mine didn't burn at all, so don't worry!


7. Cool the banana bread in the tin and then consume at your leisure.  Mum likes to spread butter on it, but it's beautiful on its own as well!


June 23, 2013

Caramel Coconut Pecan Swirl Brownies


Do you ever have those days when you're feeling down and only a long-time-loved, tried-and-tested recipe will make you feel better?  For me, that recipe is brownies.  There's something calming and therapeutic about licking the batter off the spatula and the sides of the mixing bowl while the batter that made it into the brownie tin is baking in the oven.


For this batch of brownies, I tried something a little different and ended up dousing them in caramel and coconut and pecans.  They were absolutely mouthwatering.


(21 x 31 cm (8 x 12 inch) brownie tin)
Recipe Adapted From: How To Be A Domestic Goddess by Nigella Lawson (the brownie), and Sugar High (the caramel topping)

Ingredients - caramel
2 cups white sugar
1/4 cup corn syrup (I used Queen Glucose Syrup)
1/2 cup water
3/4 cup thickened cream
2 tbsp butter
1/2 shredded coconut
1/2 cup chopped pecans

Method
1. In a heavy-based saucepan, combine the sugar, corn syrup and water.  Cook over a medium heat and stir occasionally until the mixture reaches 175 C (350 F) on a candy thermometer, or turns a light brown colour.  This should take a while, so don't expect it to happen immediately!


2. After the mixture goes brown, remove it from the heat and quickly add 1/2 cup of the cream and all of the butter.  Mix until combined.  It will froth a bit, but keep stirring and it'll go down.

3. Stir the rest of the cream into the caramel.


4. Take about half of the caramel away (for use later).  Stir the shredded coconut and chopped pecans into the remaining caramel.


5. Set the caramel aside and start making your brownie batter!  I used Nigella Lawson's awesome recipe, the ingredients and method of which can be found here on my blog.


6. For this particular brownie, I decided to load up with the caramel because I had extra and, why not?  So, I poured a layer of brownie batter into my tin and then drizzled plain caramel on top.  (You can skip this step if you want - it makes the brownie deliciously sweet and chewy, but if that's not your thing, move right on ahead!)


I topped that off with another layer of brownie batter, making sure to cover up all of the caramel.


7. Now it's time for the coconut-pecan topping.  Blob it on top of the brownie...


...then swirl it around a bit with a knife.


8. Bake for 30-40 mins, or until the top is crackly.  A skewer inserted in the middle should come out a bit gloopy, because you don't want your brownie to be all cakey!  (Unless, of course, you like it that way - but I prefer my brownies to be sludgy and dense).


9. Leave the brownie to cool in the tin for a while then transfer to a wire rack to cool completely. I left mine in the fridge overnight to make it easier to cut.

10. Chop into whatever size pieces you desire and enjoy!


The drizzle of caramel that I sandwiched between the layers of brownie batter sunk down to the bottom, giving the lower half of the brownie a chewy texture and the rich caramel taste.  Meanwhile, up top, the coconut and pecan mixture provided a crunchy and chewy texture to break up the heaviness of the brownie.  This combo is definitely a winner.


June 15, 2013

Browned Butter Coconut Choc Chip Cookies


This recipe was my first experience with browning butter and it was quite an education.  I loved how the butter smelled after it was browned, and the dough tasted absolutely divine!  Unfortunately, I thought that the baked biscuits didn't have as much of the browned butter taste, but they were still delicious and chewy and coconutty.


Recipe Adapted From: Joy the Baker

Ingredients
1 cup butter
1 cup white sugar
3/4 cup brown sugar
1 tbsp vanilla extract
2 1/2 cups flour
3/4 tsp bicarb soda
3/4 tsp salt
1 egg
1 egg yolk
1/4 cup desiccated coconut
1 cup choc chips

Method

1. Preheat oven to 175 C (350F).

2. Line a baking tray with baking paper and spread the coconut out on top.  Put it in the oven to toast for about 5 minutes until golden brown.  I leave the oven door open and keep a sharp eye on it, because it can burn easily!  Once the coconut's brown, take it out of the oven and set aside.


3. Brown your butter!  Place the butter in a saucepan over medium heat.  It will bubble for a while and then start to brown.  


Once the butter is well browned, remove the saucepan from the heat and pour the butter into another receptacle and allow it to cool.  I was terrified of burning my butter so it ended up as this golden colour, but yours can be darker that that!


4. Beat the cooled browned butter, white sugar and brown sugar together in a mixer.  The mixture will look grainy, but don't worry!


5. Add the egg and egg yolk and beat until combined.  The mixture should now look smooth.


6. Add the vanilla extract and beat until combined.

7. Add the flour, bicarb soda and salt and incorporate.


8. Stir the coconut and chocolate chips into the dough.

9. Bake tablespoon-sized balls of dough and bake in your preheated oven for about 10 minutes or until golden brown.  They should still be soft in the middle!  Let them cool on the tray for a bit and then transfer them to a wire rack.


Or, you could just eat them.


June 9, 2013

Orange Poppy Seed Muffins


These orange poppy seed muffins (you can make them lemon flavoured, if you so choose, which is the form the original recipe came in) are sweet, moist and they're best when they're warm.  They're good for an afternoon tea snack or as a dessert!

Recipe Adapted From: The Fundamental Techniques of Classic Pastry Arts by The French Culinary Institute
Ingredients - cupcake
250g plain flour
1 tsp bicarb soda
1/4 tsp salt
115g butter/margarine
175g white sugar
2 eggs
200g sour cream
50g lemon or orange juice
Zest of one lemon or orange
14g poppy seeds (2 tbsp)

Ingredients - syrup

150mL lemon or orange juice
50g white sugar

Method

1. Preheat the oven to 175C (350F).  Line a 12-cup muffin/cupcake tin with patty pans, or alternatively just grease the bottom and sides with butter.

2. Beat the butter and sugar until light and fluffy.


3.  Add the eggs one at a time, beating after each addition.

4. Add the sour cream and lemon juice (I used the juice of the orange that I zested, and made up the rest of the weight with bottled lemon juice).  Beat until incorporated.


5. Add the flour, bicarb soda and salt.  Mix slowly or fold in until just combined.


6. Add the lemon zest (I used orange zest) and poppy seeds.  Stir gently until incorporated.  Make sure that the poppy seeds are evenly dispersed amongst the batter!


7. Spoon the batter into the cupcake tin and bake for 15 minutes or until golden brown.


8. Transfer the muffins a wire rack to cool slightly.

9. To make the syrup, combine your orange or lemon juice with the sugar in a saucepan over medium heat.  Stir over the heat until the sugar has dissolved and the mixture begins to boil.


10. Using a pastry brush, coat each muffin with the syrup.  Really douse them so they're all moist and delicious!


11. Serve the muffins as soon as possible!  


They look good when dusted with icing sugar, and they also go well with buttercream!

June 3, 2013

Chocolate Cookies with Peanut Butter Chips


I love practically all things peanut butter, so when I spied peanut butter chips in David Jones I had a bit of a freak out.


The chips are definitely peanutty, but they taste artificial and the texture is kind of weird.  However, I can safely say that they are much better when baked in a delicious cookie.

Recipe Adapted From: White On Rice Couple
Ingredients (this ingredient list is 2/5 of the original recipe from the link above and should make about 30 small cookies)
250g dark chocolate
35g butter/margarine
10mL very strong coffee
2 eggs
160g white sugar
1/2 tsp vanilla extract
35g flour
3/4 tsp baking powder
1/2 tsp salt
115g peanut butter chips

Method (this is a lot like the method for brownies, which I think says a lot about the deliciousness of these cookies!)
1. Heat the chocolate and butter in the microwave in 20 second bursts until melted.  Stir to combine and then set aside.

2. Make the strong coffee - I usually just use instant coffee and mix it with boiling water.  Set aside to cool.

3. Beat the eggs and sugar until light and fluffy.


4. Add the coffee and vanilla extract and mix to combine.

5. Combine the egg mixture and the melted chocolate, mixing to incorporate.


6. Mix the baking powder, salt and flour into the chocolate mixture until just combined.  Stir the peanut butter chips in, then cover and leave to chill in the fridge for about 20 minutes.


7. Roll your chilled dough into logs of whatever size you like.  Wrap in cling wrap and put in the freezer or fridge until fairly hard.  You want to be able to cut them with a knife without having the logs squish or collapse.

8. When your logs are firm enough, preheat your oven to 205 C (400 F).

9. There are two different looks you can do for your cookies.  The first will let your peanut butter chips stay whole within your cookie, while the second will leave some of your peanut butter chips cut.  It's really a matter or your personal preference - both look good and taste exactly the same.

Option 1 (hand rolling): break bits of dough off the logs and roll in your hands until spherical.


Option 2 (cutting): using a sharp knife, cut the log into slices.


10. Bake for about 10 minutes.  You want the cookies to be squishy in the middle.


 Enjoy!