

Well, no, I haven't really surfaced yet - I'm just floundering on the surface for a moment before I sink back under.
But don't mind my maths homework lurking in the corner, my friends. Instead, take a look to the right of your screen and you'll see a 'World's Greatest Shave' button. This button will take you to my fundraising page.
I am supporting the Leukaemia Foundation this year and I just shaved my head last weekend. Yes, I am a teenage girl and yes, shaving off all my hair was a bit hard - but it's for a good cause and I'm proud of my efforts. The purpose of the Shave for a Cure, if you haven't heard of it, is to raise awareness about leukaemia and for participants to have a small feel for the side effects of leukaemia treatment (losing your hair).
It would be greatly appreciated if you would sponsor me, by donating as little or as much as you can at my sponsorship page. The money goes towards improving leukaemia, lymphoma and myeloma treatment, finding cures as well as supporting leukaemia patients and their families. I've raised over $2500 online and in cash so far.
All donations are appreciated!
----------------------------------------------------------------
Happy belated Valentine's Day, everyone!
This year, to give to my friends and family, I made Almond Cinnamon Biscuits and Chocolate Biscuits then flooded them in pink and white. Though the rolling out of dough, cutting, refrigerating and transferring can be tedious, I loved icing them and seeing them all on their trays looking pretty.
My friends loved them and so did my Great-Grandfather!
----------------------------------------------------------------
Recipes adapted from: Homestyle Cookies, Muffins and Cakes
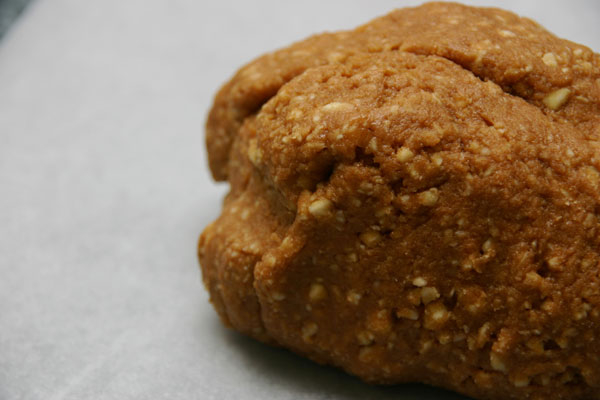
Almond Cinnamon Biscuits
These were...annoying to make. The dough was super sticky and didn't really taste that good (so I didn't want to snack on it much), and cutting out the biscuit shapes was lame because the dough stuck to the cookie cutters. The resulting cookie was slightly crunchy and very chewy, but they had a very nice almond-cinnamon taste.
Ingredients
200g blanched almonds (or 200g almond meal)
90g caster sugar
40g icing sugar
3 tsp ground cinnamon
100g flour (plus a lot more for dusting and kneading)
30g self-raising flour
2 egg whites
Method
1. Preheat the oven to 150 degrees C (300 F)
2. Place the almonds, sugars, cinnamon and flours into a food processor.

3. Process for 30 seconds or until the mixture resembles fine breadcrumbs.

4. Add the egg whites and process for 30 seconds, or until a soft, sticky dough forms. Add some more flour a little bit at a time if the dough is too sticky.

5. Turn the dough out onto a well floured surface and knead, adding flour as you go until the dough is easily handle-able. Make sure your work surface has quite a bit of flour on it - if there's an un-floured patch, the dough will stick.
6. Roll the dough between two sheets of baking paper to about 5mm thick. I found it very difficult to roll out.

7. Cut the rolled out dough into whatever shape you want using strong cookie cutters. I made little stars and love hearts.

8. Place the cut out cookies onto a baking tray covered with baking paper (or a silicon mat).

Bake for 12 minutes, or until the biscuits are lightly browned.
9. Transfer the biscuits to a wire rack to cool completely.
10. Ice with royal icing.


Ingredients
200g blanched almonds (or 200g almond meal)
90g caster sugar
40g icing sugar
3 tsp ground cinnamon
100g flour (plus a lot more for dusting and kneading)
30g self-raising flour
2 egg whites
Method
1. Preheat the oven to 150 degrees C (300 F)
2. Place the almonds, sugars, cinnamon and flours into a food processor.
9. Transfer the biscuits to a wire rack to cool completely.
10. Ice with royal icing.
----------------------------------------------------------------
Basic Chocolate Biscuits with Royal Icing
These chocolate biscuits are very chocolatey, dark and rich. They have a great shortbread texture and royal icing goes on them very well.
Ingredients
125g butter/margarine
90g icing sugar (use more if you want a sweeter biscuit)
1 egg
200g plain flour
1 tbsp corn flour
4 tbsp cocoa
100g dark chocolate
Method
1. Preheat oven to 180 degrees C (350 F)
2. Melt the chocolate and set aside to cool.
3. Beat the butter and icing sugar until light and creamy.

4. Add the egg and beat until smooth. My egg was cold when I added it so it took a while for the mixture to conglomerate - if it won't come together, just keep beating. Patience, my young apprentice.

5. Add the flour, corn flour and sifted cocoa and mix until well combined.
6. Mix in the chocolate.
7. Wrap the dough in clingwrap and refrigerate.
8. Roll the dough between two sheets of baking paper until about 5 mm thick.
9. Cut the dough into shapes using cookie cutters. Peel some of the dough away from the outsides of the cut shapes and freeze for a few minutes. I find that freezing the dough makes it much easier to transfer to baking trays.
10. Place the cookie shapes on baking trays and bake in the preheated oven for 10 - 12 minutes, or until golden. (You can't really tell with these cookies because they're so dark in the first place, so just go with the time)
11. Transfer the biscuits to a wire rack to cool completely.
12. Ice with royal icing.
I left some of the dough white (just didn't add the cocoa and chocolate). The dark brown and white makes for pretty biscuits.
Lots of love.
As usual, you make the cutest and more professional looking biscuits i have ever seen. How can you handle icing that well? When I try to pipe something it just looks like something shat on the cookie D:
ReplyDeleteI donated 2 dollars!!!! XD Which I think is pretty good considering the fact that I kept forgetting to bring money..
ReplyDelete@ Panda: aww, I'm glad you like them! They do take a lot of practise though, I've been doing it since I was little. If you keep at it, eventually they get good!
ReplyDelete@ Edara: YOU SO GENEROUS <3