Showing posts with label royal icing. Show all posts
March 15, 2013
What cupcakes do you make for podiatrists?
Supplying birthday cakes for a medical clinic is lots of fun, especially when it's a podiatrist's birthday. I've done little petit four feet before, but these feet cupcakes are cuter (in my opinion) and much, much easier. I never thought I'd call any feet other than babies' feet cute, but hey.
I used my tried and true vanilla cupcake recipe, levelled the tops off, then spread a circle of white royal icing on with a knife. Easy. Then I tinted some royal icing purple (you can use whatever colour you like, but I'd avoid red, because I think that'd make the feet look a bit diseased) and plopped it in a ziplock bag, then cut a hole in the corner and piped some little feet on.
They're so cute, argh. Just look at their little dotty toes!
December 24, 2011
Merry Christmas!
Merry Christmas, everybody!
Gingerbread, nicely packaged in cellophane bags with little ribbons, make lovely gifts!
Mum did most of the gingerbread baking this year, while I stuck to decorating.
We managed to churn out a couple of gingerbread houses, too.
I got a bit more artsy with the wall designs. I piped them on and let them dry before I constructed the houses.
I hope everyone has a fantastic Christmas!
March 17, 2011
There's Always Time for Love {Flooded Almond Cinnamon Biscuits & Chocolate Biscuits}
Well, no, I haven't really surfaced yet - I'm just floundering on the surface for a moment before I sink back under.
But don't mind my maths homework lurking in the corner, my friends. Instead, take a look to the right of your screen and you'll see a 'World's Greatest Shave' button. This button will take you to my fundraising page.
I am supporting the Leukaemia Foundation this year and I just shaved my head last weekend. Yes, I am a teenage girl and yes, shaving off all my hair was a bit hard - but it's for a good cause and I'm proud of my efforts. The purpose of the Shave for a Cure, if you haven't heard of it, is to raise awareness about leukaemia and for participants to have a small feel for the side effects of leukaemia treatment (losing your hair).
It would be greatly appreciated if you would sponsor me, by donating as little or as much as you can at my sponsorship page. The money goes towards improving leukaemia, lymphoma and myeloma treatment, finding cures as well as supporting leukaemia patients and their families. I've raised over $2500 online and in cash so far.
All donations are appreciated!
----------------------------------------------------------------
Happy belated Valentine's Day, everyone!
This year, to give to my friends and family, I made Almond Cinnamon Biscuits and Chocolate Biscuits then flooded them in pink and white. Though the rolling out of dough, cutting, refrigerating and transferring can be tedious, I loved icing them and seeing them all on their trays looking pretty.
My friends loved them and so did my Great-Grandfather!
----------------------------------------------------------------
Recipes adapted from: Homestyle Cookies, Muffins and Cakes
Almond Cinnamon Biscuits
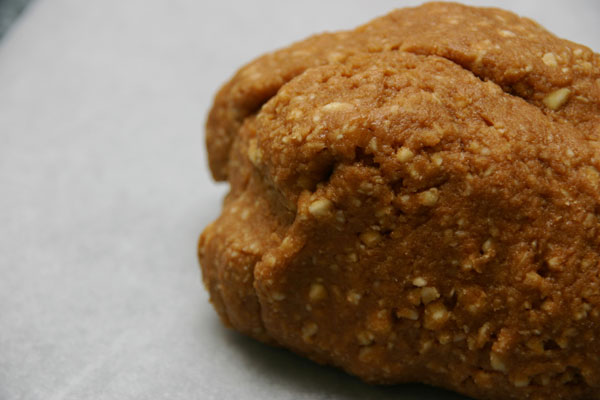
These were...annoying to make. The dough was super sticky and didn't really taste that good (so I didn't want to snack on it much), and cutting out the biscuit shapes was lame because the dough stuck to the cookie cutters. The resulting cookie was slightly crunchy and very chewy, but they had a very nice almond-cinnamon taste.
Ingredients
200g blanched almonds (or 200g almond meal)
90g caster sugar
40g icing sugar
3 tsp ground cinnamon
100g flour (plus a lot more for dusting and kneading)
30g self-raising flour
2 egg whites
Method
1. Preheat the oven to 150 degrees C (300 F)
2. Place the almonds, sugars, cinnamon and flours into a food processor.
3. Process for 30 seconds or until the mixture resembles fine breadcrumbs.
4. Add the egg whites and process for 30 seconds, or until a soft, sticky dough forms. Add some more flour a little bit at a time if the dough is too sticky.
5. Turn the dough out onto a well floured surface and knead, adding flour as you go until the dough is easily handle-able. Make sure your work surface has quite a bit of flour on it - if there's an un-floured patch, the dough will stick.
6. Roll the dough between two sheets of baking paper to about 5mm thick. I found it very difficult to roll out.
7. Cut the rolled out dough into whatever shape you want using strong cookie cutters. I made little stars and love hearts.
8. Place the cut out cookies onto a baking tray covered with baking paper (or a silicon mat).
Bake for 12 minutes, or until the biscuits are lightly browned.
9. Transfer the biscuits to a wire rack to cool completely.
10. Ice with royal icing.
Ingredients
200g blanched almonds (or 200g almond meal)
90g caster sugar
40g icing sugar
3 tsp ground cinnamon
100g flour (plus a lot more for dusting and kneading)
30g self-raising flour
2 egg whites
Method
1. Preheat the oven to 150 degrees C (300 F)
2. Place the almonds, sugars, cinnamon and flours into a food processor.
9. Transfer the biscuits to a wire rack to cool completely.
10. Ice with royal icing.
----------------------------------------------------------------
Basic Chocolate Biscuits with Royal Icing
These chocolate biscuits are very chocolatey, dark and rich. They have a great shortbread texture and royal icing goes on them very well.
Ingredients
125g butter/margarine
90g icing sugar (use more if you want a sweeter biscuit)
1 egg
200g plain flour
1 tbsp corn flour
4 tbsp cocoa
100g dark chocolate
Method
1. Preheat oven to 180 degrees C (350 F)
2. Melt the chocolate and set aside to cool.
4. Add the egg and beat until smooth. My egg was cold when I added it so it took a while for the mixture to conglomerate - if it won't come together, just keep beating. Patience, my young apprentice.
5. Add the flour, corn flour and sifted cocoa and mix until well combined.
6. Mix in the chocolate.
7. Wrap the dough in clingwrap and refrigerate.
8. Roll the dough between two sheets of baking paper until about 5 mm thick.
9. Cut the dough into shapes using cookie cutters. Peel some of the dough away from the outsides of the cut shapes and freeze for a few minutes. I find that freezing the dough makes it much easier to transfer to baking trays.
10. Place the cookie shapes on baking trays and bake in the preheated oven for 10 - 12 minutes, or until golden. (You can't really tell with these cookies because they're so dark in the first place, so just go with the time)
11. Transfer the biscuits to a wire rack to cool completely.
12. Ice with royal icing.
I left some of the dough white (just didn't add the cocoa and chocolate). The dark brown and white makes for pretty biscuits.
December 17, 2010
Gingerbread House
Assembling the gingerbread house
1. Find a sturdy cardboard box and cut a square (or whatever shape you want, really) out of it.
The square should be larger than the base of your house. This square is what the house will rest on! Cover the square in aluminium foil.
2. When the shapes are completely cool, you can see if they fit together right. During baking, the shapes usually go a bit wonky; so cut off any excess biscuit from the bottoms of the triangles and short sides of the rectangles.
The house fits together with the two triangles standing next to each other, and the rectangles leaning flush against the triangles' sides. Ideally, there should be no gap between the two rectangles at the top.
3. Put some - not all - of the royal icing into a snap seal bag, squeeze the air out and seal the bag. Cut a smallish hole in one of the corners, so the icing can squeeze out of it.
Alternatively, you can use a piping bag. But hey, snap seal bags are easy and disposable! Less washing up!
3. Pipe royal icing onto the bottom of the two triangles. Place the triangles on the foil-covered-cardboard with their backs to each other. The room between them should be a little smaller than the width of the rectangle wall.
Hold the triangles steady for a while as the icing hardens (it's handy to have a helper for this).
4. Once the triangles can almost stand on their own (the wall that is added now will help them stay up) you can add one of the rectangular walls.
Pipe more royal icing onto one side of the triangles, and to the bottom of the rectangle. Place the rectangle flush against the two triangles and hole for a minute or two while the icing hardens.
It is tradition, at this point, to add two gingerbread people to the inside of the house.
5. Pipe royal icing down the other two sides of the triangles and on the bottom of the last rectangle. Place the rectangle flush against the sides of the triangle, and hold it there for a minute until the icing hardens up.
Ta daaaa! Now your house is up!
6. Now for those pesky little freaking ginormous cracks that you didn't foresee would appear.
But do not fear! There is an easy solution - stuff the crack with marshmallows, choc chips or whatever lollies you've got lying around. That way the icing won't drip into the crack and leave a gaping chasm.
7. Gather decorations for your house. I usually use: marshmallows, cachous (small, hard, shiny spheres that you can break your teeth on), sprinkles of various colours, M & Ms, Skittles and liquorice allsorts (I detest liquorice, but allsorts are pretty colours).
8. Lather the top of the house with icing, and let it drip down the sides a bit. It's cool if it looks like authentic stereotypical snow. Then stick whatever lollies you want on it, or you could wait for the icing to dry and pipe designs on with royal icing.
This part is especially fun for kids!
I used chopped up liquorice allsorts to cover the faint pink tinge of marshmallows showing through the icing.
There are so many things you can do with gingerbread houses - get creative, and feel free to ask any questions in the comments.
Merry Christmas!
December 16, 2010
Gingerbread and Royal Icing
This post will show you how to make gingerbread and royal icing, and my following post will detail how to assemble a gingerbread house.
Recipe Adapted From: Gorgeous Biscuits (a Family Circle book)
Ingredients
140g butter
115g brown sugar
90g treacle (can substitute golden syrup)
1 egg
250g plain flour
30g self-raising flour (can substitute 30g plain flour and 1/2 tsp baking powder)
3 tsp ground ginger
2 tsp ground cinnamon
3/4 tsp ground cloves
3/4 tsp nutmeg
1 tsp bicarb soda
Various decorations (outlined below under assembly instructions) for decorating the house
Method
1. Beat the butter and sugar until light and fluffy.
I just use my K/paddle beater for this, or the dough hook which makes less mess.
When they're cool, move them to a baking tray covered with baking paper or a silicone mat. To do this, I flip the shapes onto the palm of my hand then flip my hand so they land on the baking paper the right way up.
6. c. Follow instructions for royal icing. Pipe the icing from a small hole in the corner of a snap seal bag into patterns or designs on the biscuits. If desired, you can stick small lollies (such as M & Ms, cachous, sprinkles etc) on the wet icing.
7. a. If you're making a house, cut two isosceles triangles and two rectangles out of the dough (you'll probably need more than one sheet). You can make them any size - however, make sure that the long sides of the triangles are the same length as the long sides of the rectangles.
Chill the cut shapes in the freezer, then transfer them to a baking tray covered with baking paper or a silicone mat.
7. b. Bake for 10 - 15 minutes. Let cool on the tray, then transfer to a cooling rack.
7.c. Follow instructions for royal icing below, then instructions for assembling the gingerbread house in my next post.
------------------------------------------------------------------------------------
Royal icing is the cement of the baking world.
Royal Icing Ingredients
1 egg white
1/2 tsp lemon juice
125g icing sugar
Royal Icing Method
1. Whisk the egg white until foamy. It doesn't take much effort, so you can do it by hand.
3. Whisk in the icing sugar until the icing is thick, glossy and with no lumps. When you lift up the whisk and dribble the icing back into the bowl, it should make patterns on the surface that stay there for a while before fading back into the mass.
If the icing isn't thick enough, add more icing sugar.
If the icing is too thick, add more lemon juice.
4. If you so desire, tint the icing a different colour than white by adding food colouring and mixing.
Subscribe to:
Posts (Atom)